

Learn how to do IP based authentication
How to add your own IP to IP manager
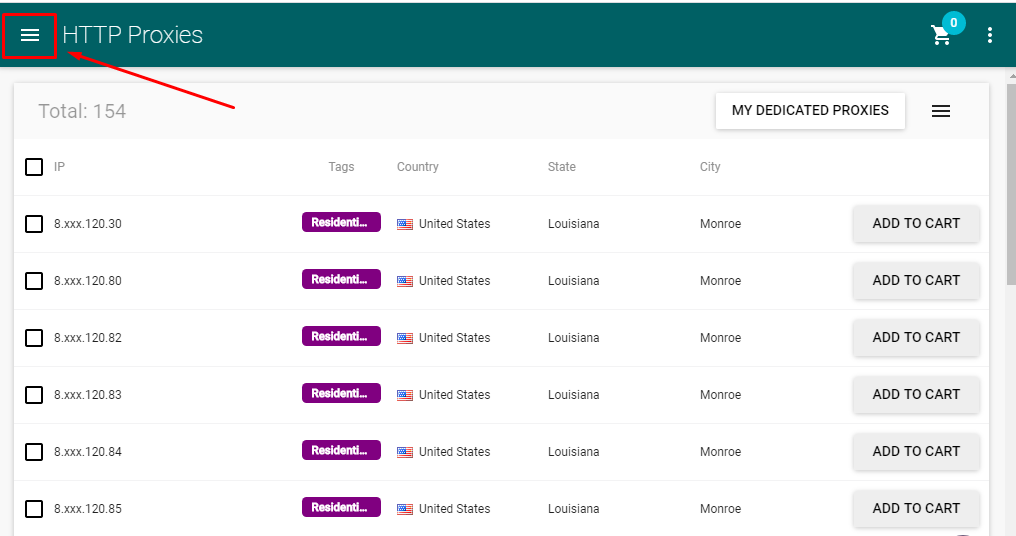
First, log in to your account and click on the hamburger button in the upper left corner to show the menu if it’s hidden.
Select one category of proxies from the left column and click on My Dedicated Proxies. It doesn’t matter the proxy type you choose as the change will take place overall.
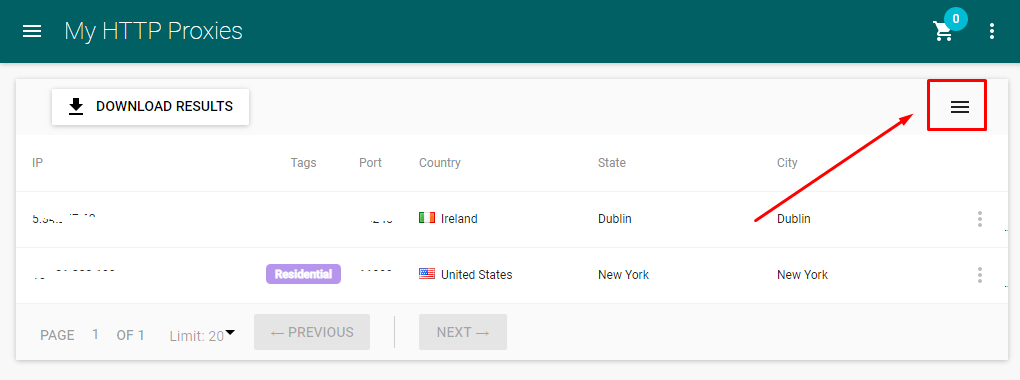
New options will be shown in the right column of the screen. If the column is hidden, click on the hamburger button to reveal it.
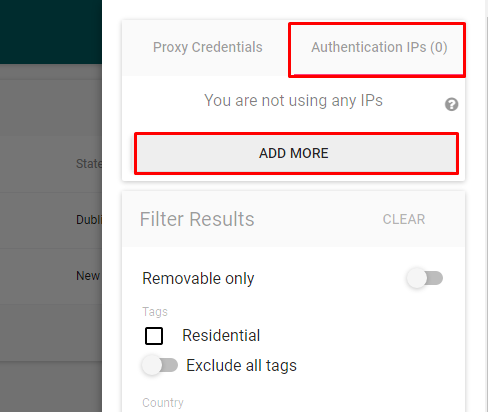
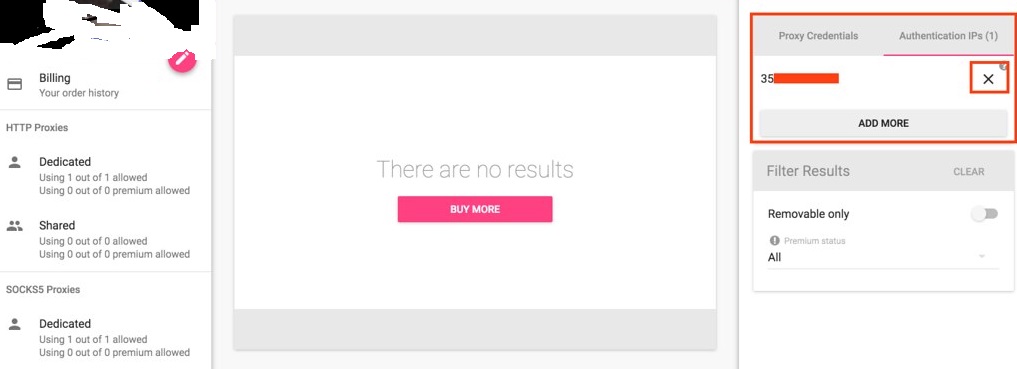
Go to the Authentication IPs tab and click Add More.
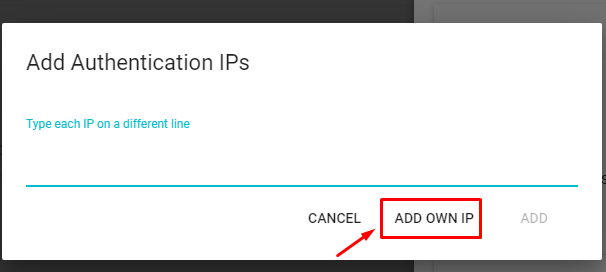
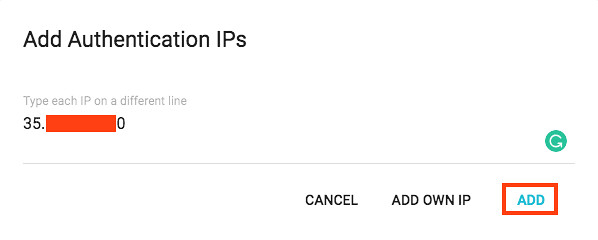
A new window will pop up where you can type in particular IPs. To add your own IP, click on Add Own IP.
Your IP will be pulled automatically. Click on Add to save it.
All your Authentication IPs will be shown under the Authentication IPs tab no matter the proxy category you’re in. To remove an IP, just click on the X next to it.